Email has been part of our daily personal and business communications. It’s typically the first application we open at work and I bet it’s open throughout the rest of the day. As something we use every day for personal and work purposes, Gmail is more than a tool to send and receive emails.
You can do more with Gmail if you familiarize yourself with the nooks and crannies this tiny yet powerful app has. Here are the 8 tips and tricks to up your Gmail game:
Enable Undo Send
There are times after you click the send button, you realize that you missed a small detail in your email. The problem is there’s no way to cancel the sending of the email in Gmail. That is the case by default. But you can change this by turning on the ‘Enable Undo Send’ option in your Gmail’s settings. It gives you a window of time to cancel any email you send.
For example, you set the cancellation period for 20 seconds. What happens is that after clicking ‘Send’, you have 20 seconds to undo the sending. This is a great trick for people who often commit mistakes when sending email, something minor like a misspelling or important like sending it to the wrong email address.
William Torres, SEO Specialist at KeyForge, shares, “To undo the sending of the email, just click the ‘Cancel’ option. This simple setting alone saved me numerous times in sending an email that is not complete or not right.”
Steps:
- Click the cog settings button.
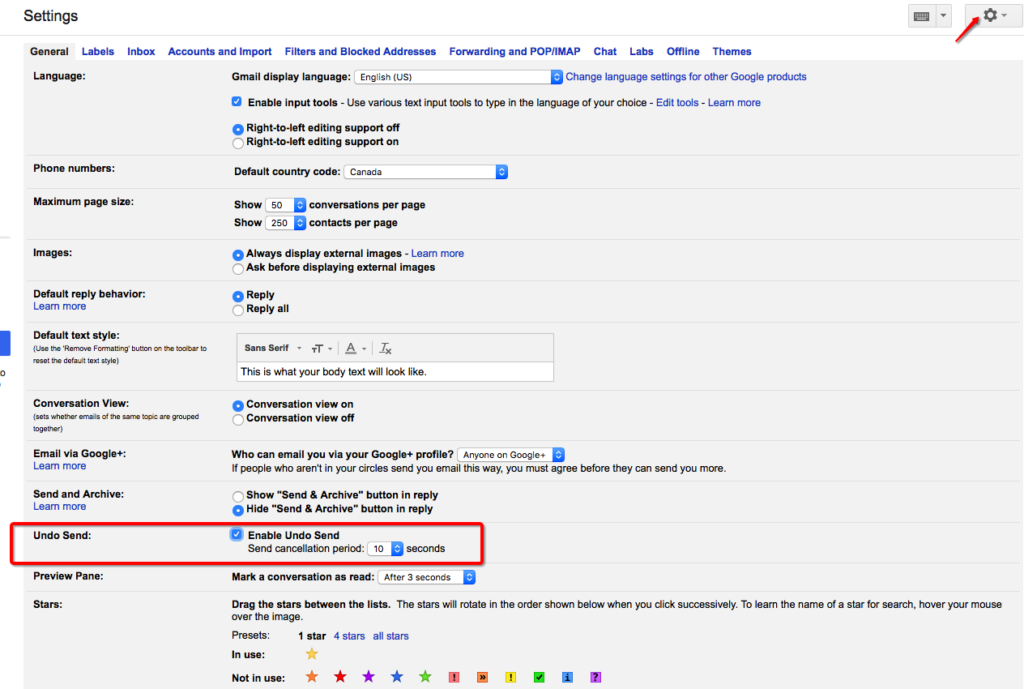
- Scroll down and look for the option ‘Undo Send’.
- Tick the feature ‘Enable Undo Send’.
- Set the cancellation period.
Canned Responses
There are probably some emails you find yourself sending over and over. To skip the annoying copy pasting part of replying, you can enable ‘Canned Responses’ in Gmail Labs.
Lindsey Handley of ThoughtSTEM shares, “Canned responses have saved me several hours by now. After enabling, click on the down arrow button for more options (lower right-hand corner) when replying or composing a new email. In there you can see your canned responses. Click “New canned response’ to create your most commonly sent emails.”
Steps:
- Click the cog settings button.
- Click ‘Labs’.
- Scroll down and look for ‘Canned Responses’ or alternatively, you can type it in the search box.
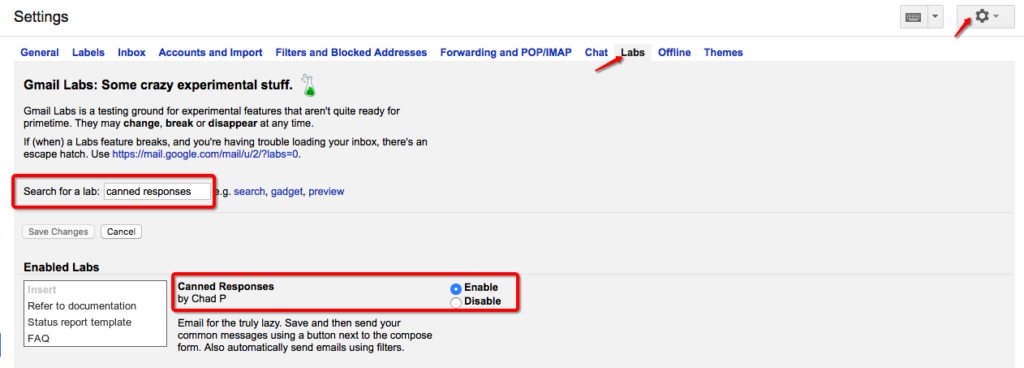
- Tick the ‘enable’ radio button.
- Click ‘Save Changes’.
- To use a canned response, just click the ‘more options’ button, then ‘Canned Responses’, then click the specific response you want to use.
Filtering Messages
If you receive several messages per day, it’s indeed tedious going through these emails one by one. To make your life easier, you can use Gmail’s message filtering feature to organize your inbox.
Michelle Aberant, Operations Manager at Avanti Homes, gets a lot of emails a day about different matters. “I get a lot of emails every day from clients, colleagues, and contractors. Setting up filters makes my inbox more organized and efficient. I get to automate incoming messages I want to mark as read or label,” says Michelle.
Steps:
- Click one of the recurring emails you’d like to filter.
- Click the down arrow button (upper right corner) for more options.
- Select ‘Filter messages like this’

- You will then be shown filter options you can customize as to your preference.
- Click ‘Create filter with this search’.
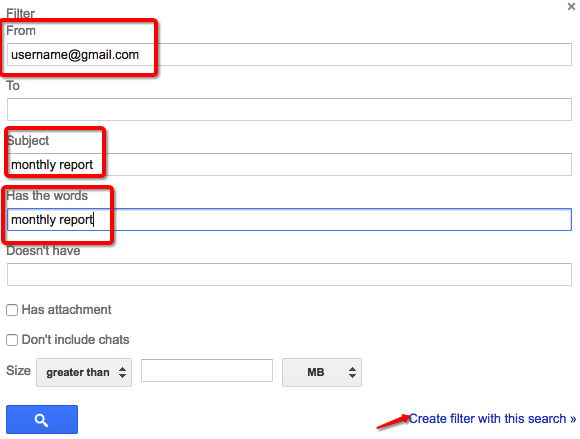
- From the list of options you are shown, you can select what you want to do with emails that match your filter. You can mark them as read, label them, delete them, and more.
Preview Pane
Quickly read through your inbox by splitting your view, either vertically or horizontally, using the ‘Preview Pane’ in Google Labs.
FREE Branding & Digital owner, Chris Bolivar, says, “By enabling the ‘Preview Pane’, I no longer have to go back and forth clicking the back button when reading emails. I click on one and read it on the preview pane. I simply click on another message to view it without clicking the back or inbox button multiple times. Saves me a lot of time and mouse power!”
Steps:
- Click the cog settings button.
- Click ‘Labs’.
- Scroll down and look for ‘Preview Pane’ or alternatively, you can type it in the search box.
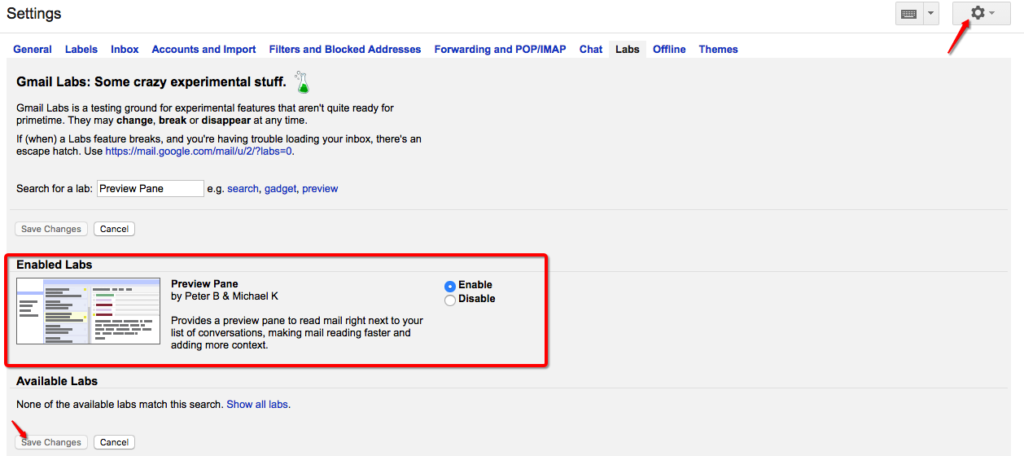
- Enable ‘Preview Pane’.
- Go back to your inbox and choose your preview pane orientation.

Add Emails as Tasks
This feature is perfect to boost organization and business efficiency as you can create a task list with a few mouse clicks
“There is no need to spend time writing out the details of the task because the entire email is on the task for you to look through,” explains Samuel Wheeler, Communications Manager at SD Equity Partners.
Steps:
- Select the email you want to add as a task.
- Click the ‘More’ button then select ‘Add to Tasks’.
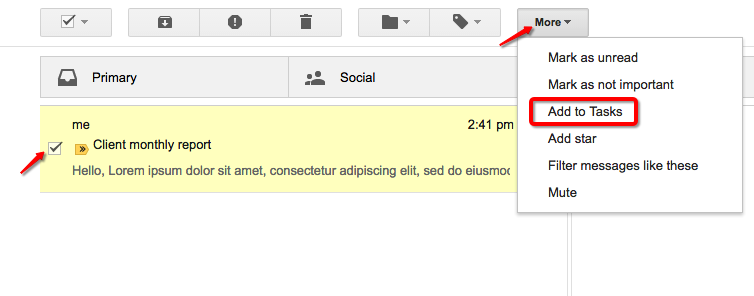
- To view your tasks, just click the down arrow button besides Gmail then click ‘Tasks’.

Keyboard Shortcuts
Who doesn’t love shortcuts? Keyboard shortcuts can really boost your productivity by simply combining a couple of commands on your keyboard.
“By far, the thing that has increased my productivity within Gmail has been learning and using the keyboard shortcuts. You have to enable them in your settings first, but once you do you can quickly and easily manage your mail. I use the Archive shortcut (just press the E key) to archive a message and get back to the Inbox. When you read as many emails a day as I do this is a huge timesaver,” CEO of Deep Field, Inc., Jim Lastinger.
Steps:
- Click the cog settings button.
- Scroll down and look for the option ‘Keyboard shortcuts’.
- Tick the radio button option ‘Keyboard shortcuts on’.
- Familiarize yourself with the shortcuts here.
Signing Out from All Your Devices
If you have multiple devices wherein you use Gmail like your computer, smartphone, or tablet, you can log out from all these devices without manually logging out one by one.
Jordan Sanders of Tmetric, a free online time tracking app, says, “It’s important that you check your account activity regularly for security purposes. Not a lot of people know this feature in Gmail because the button is at the bottom and it’s very small. However, this is a great feature and saves you a lot of time logging out from all your devices.”
Steps:
- Scroll down to the very bottom of your Gmail dashboard.
- Click ‘Details’.
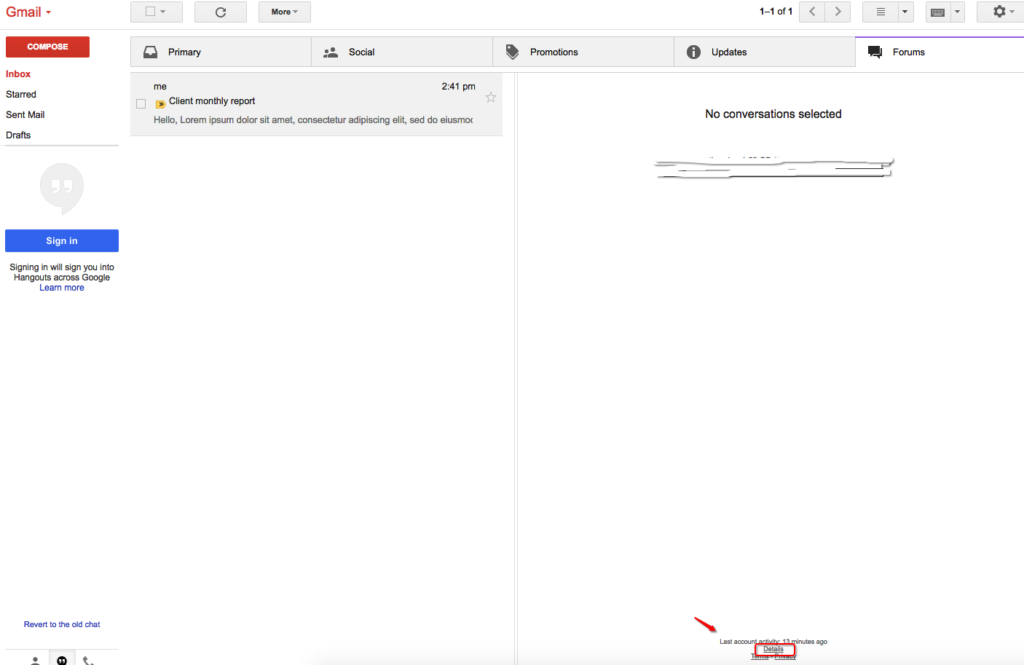
- Click ‘Sign out all other web sessions’.

Send Mail As
If you use multiple emails accounts from other webmail providers, no need to jump from one app to another. You can send and receive emails using your other email addresses on one Gmail account.
“Typically, once you’ve setup your emails with your hosting provider, such as for your domain, rather than having to check emails through the website’s webmail provider, you can setup the details of the account using the Gmail ‘Send as’ and ‘Check Mail from other accounts’ wizard. You will then be able to send and receive from other email accounts you own,” explains David Attard, Founder of DART Creations.
Steps:
- Click the cog settings button.
- Click ‘Labs’.
- Look for ‘Send mail as’ then click ‘Add another email address you own’.
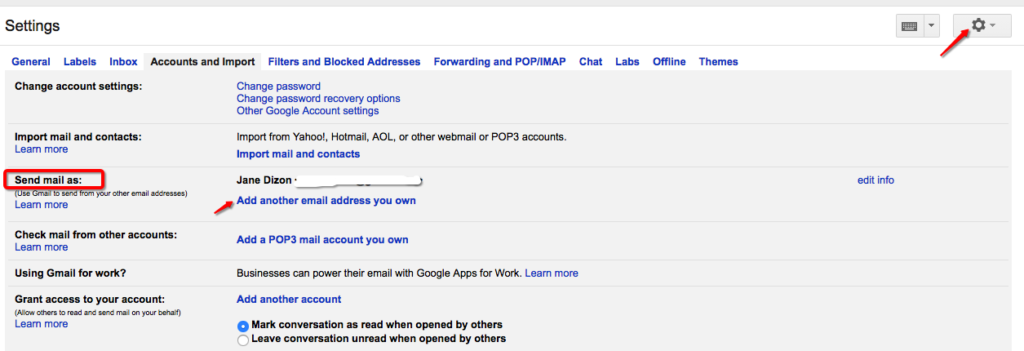
- Fill out the boxes needed then click ‘Add account’.


